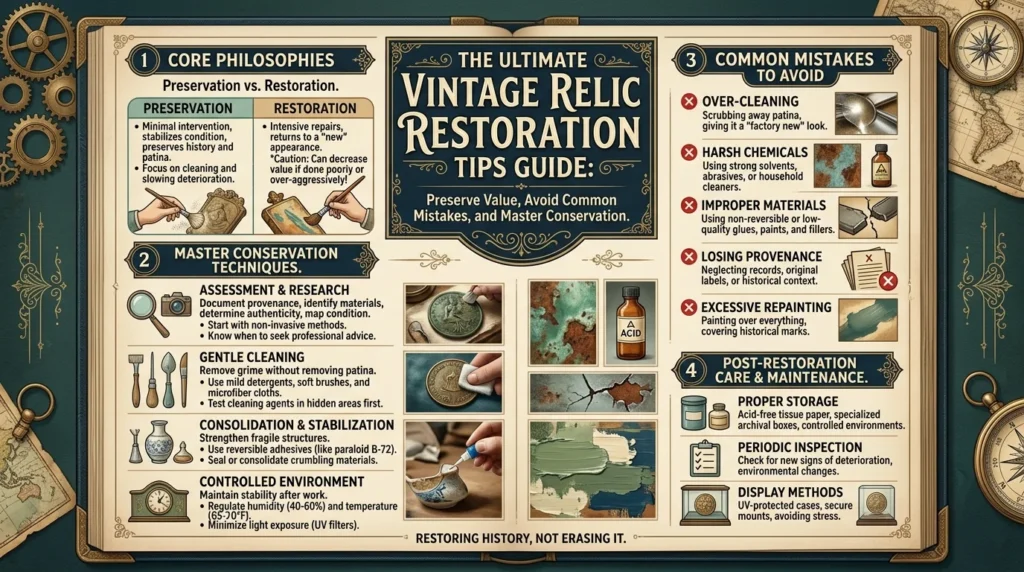
The Ultimate Vintage Relic Restoration Tips Guide: Preserve Value, Avoid Common Mistakes, and Master Conservation
Discovering a vintage relic—whether a weathered wooden chest from your grandmother’s attic, a tarnished silver teapot from an estate sale, or a cracked ceramic vase picked up at a flea market—is an invitation to connect with the past. But the moment you decide to “fix it up,” you face a critical question: How do you restore a vintage relic without destroying its value, authenticity, or historical integrity?
The answer is more nuanced than most people realize. In the world of antique conservation, well-intentioned DIY efforts are responsible for more lost value than age, wear, or even damage. A piece of furniture stripped of its original patina can lose 50% or more of its worth. A silver spoon over-polished until the hallmark is faint becomes indistinguishable from a reproduction. This comprehensive guide provides professional-grade restoration tips for wood, metal, ceramics, textiles, and more, drawn from museum practices and expert conservators.
Part 1: Understanding the Two Paths – Restoration vs. Conservation
Before touching any vintage relic, you must decide which philosophical approach you will take. The two are often confused but have dramatically different outcomes for value and authenticity .
| Approach | Goal | What It Involves | Impact on Value |
|---|---|---|---|
| Conservation | Freeze the piece in time, preserving its current state | Light cleaning, joinery stabilization, preventing further decay. Original finish is kept intact, flaws and all. | Highest value retention. Collectors pay premiums for original surfaces and patina. |
| Restoration | Return the piece to how it looked when brand new | Removal of original finish, replacing worn elements, refinishing. | Risky. When done incorrectly (by amateurs), value is often destroyed. Requires specialist skills. |
As one furniture conservator explains, “The closer to being intact and original, the higher the value retained.” For most vintage relic owners, conservation is the safer, wiser choice. Restoration should be left to professionals handling museum-quality pieces or items with little original value remaining .
Part 2: The Three Sacred Principles of Relic Restoration
Professional conservators worldwide follow strict protocols. The most important are the principles of minimal intervention, reversibility, and respect for original materials .
Principle 1: Minimal Intervention
Do only what is necessary. If a wooden table has a dull finish but is structurally sound, a gentle cleaning and waxing may be all it needs. Do not sand, strip, or refinish unless absolutely required.
As a conservator at the Inner Mongolia Museum’s “cultural relics hospital” states, “Naturally formed rust, which is stable in condition, is also part of a relic’s historical information. We must follow the principle of minimal intervention in restoration” .
Principle 2: Reversibility
Any treatment you apply should be able to be undone by future conservators without damaging the original material. This means avoiding permanent alterations and using adhesives that can be reversed.
What to avoid: Superglue (cyanoacrylate) and modern PVA (white) glues. These create rigid, permanent bonds that cannot be reversed and may split surrounding wood as the piece expands and contracts with humidity changes .
What to use instead: Traditional hide glue for furniture repairs. Hide glue is reversible—future restorers can soften it with heat and moisture to disassemble joints without damaging the wood .
Principle 3: Respect Original Materials
Do not replace original components unless they are beyond saving. Even then, keep the original parts. As one expert advises, “If a part must be replaced, keep the original. Wrap it, label it and store it safely” .
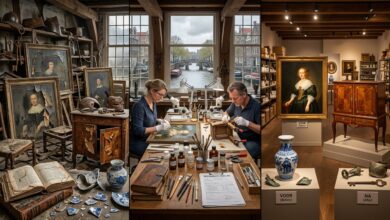
Part 3: Step-by-Step Tips for Specific Relic Types
Different materials require dramatically different care approaches. What works for wood can destroy textiles, and what cleans metal may corrode ceramics.
Wooden Relics (Furniture, Frames, Carvings)
Wooden antiques are the most common category for home restorers—and the most frequently damaged by well-meaning efforts.
Cleaning:
- Dust with a lint-free cloth or natural bristle brush. Use a small artist’s brush to clean carved details and moldings .
- For sticky grime, lightly dampen a cloth with distilled water and a drop of pH-neutral soap. Wring the cloth nearly dry before wiping.
- Never use all-purpose furniture sprays. They leave residues that attract dust and can react with old finishes.
Reviving a dull finish:
- Conservators often favor microcrystalline wax applied sparingly and buffed with a soft cloth. This adds a subtle sheen without penetrating or altering the original finish .
What to never do:
- Never sand. Sanding removes the original surface and patina, which are integral to both value and authenticity. Once original patina is gone, it is gone forever.
- Never use harsh chemical strippers. These can melt away old glues and damage the wood beneath .
- Avoid “miracle” home remedies like lemon juice or vinegar. These can leave stains, warping, or corrosion .
Repairing structural issues:
- A slightly wobbly chair leg or loose drawer joint can sometimes be tightened using traditional hide glue. This adhesive is reversible and allows future restorers to work with the piece.
- For serious structural issues (split panels, veneer repair, inlay work, French polishing), call a professional .
| Wood Treatment | Safe to DIY? | Why / Why Not |
|---|---|---|
| Dusting with soft brush | Yes | Removes surface dirt without damage |
| Wiping with barely-damp cloth | Yes | Use distilled water only; wring thoroughly |
| Applying microcrystalline wax | Yes | Sparingly applied, buffed gently |
| Tightening joints with hide glue | Maybe | Requires knowledge; test on hidden area first |
| Sanding or stripping | No | Destroys original patina and value |
| Using vinegar or lemon juice | No | Causes irreversible staining and corrosion |
| French polishing | No | Requires specialist training |
Metal Relics (Silver, Bronze, Iron)
Metal relics present unique challenges because corrosion can be either protective (good) or destructive (bad).
Understanding Patina vs. Harmful Rust:
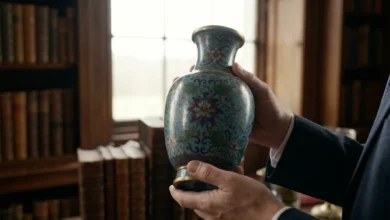
- Patina (stable corrosion): On bronze, a green or brown surface layer that forms naturally over centuries. This is desirable and protective. On silver, a soft, warm oxidation (tarnish) that many collectors appreciate.
- Harmful rust: On iron, red, flaking rust that continues to eat into the metal. On bronze, “bronze disease” (light green powder) that spreads like an infection .
Cleaning silver:
- For light tarnish, a non-abrasive silver polish applied sparingly with a cotton bud or soft cloth is acceptable.
- Do not over-polish. Over-polishing strips away the thin layer of oxidation that gives antique metal its character and can wear down hallmarks .
- Never put antique silver in a dishwasher. The heat, detergents, and contact with other metals will cause damage.
Cleaning bronze:
- Dust gently with a soft brush.
- Do not attempt to remove stable green patina. As one museum conservator explains, “Naturally formed rust, which is stable in condition, is also part of a relic’s historical information” .
- If you see “bronze disease” (active corrosion), consult a professional. Do not try to treat it yourself.
Iron relics:
- Surface rust can be stabilized with gentle cleaning, but aggressive removal destroys the object’s character.
- For valuable iron pieces (tools, hardware, ornamental work), consult a conservator before any treatment.
Ceramics and Glass Relics
Ceramics and glass are among the most fragile relics and the most easily damaged by improper handling.
Cleaning:
- Always wash by hand in a basin lined with a tea towel to prevent chipping. Use warm water with a small amount of mild washing-up liquid .
- Never use a dishwasher. The heat and harsh detergents can damage glazes, fade decorations, and cause cracks.
- Support fragile ceramics from the base, not by the handle, rim, or stem, which are more susceptible to breaking off .
What to avoid:
- Never use superglue for repairs. Many adhesives yellow over time, leaving visible repair lines and causing permanent staining.
- Avoid displaying fragile pieces in direct sunlight, which can fade painted decorations.
- Maintain stable temperatures to avoid expansion and contraction that can weaken joints or cause cracks.
When to call a professional:
All structural repairs to ceramics and glass—from filling chips to rejoining broken pieces—should be done by a professional who can use color-matched fills that blend invisibly with the original surface .
Textiles and Upholstery
Antique fabrics are deceptively fragile. What looks sturdy may crumble when handled.
Cleaning:
- Vacuum using a low-suction setting and a soft brush attachment, working with the direction of the weave .
- For loose surface dust, a dry sponge (sometimes called a “smoke sponge”) lifts particles without moisture or abrasion.
- If the fabric feels brittle, hold a piece of muslin cloth over the surface as you vacuum to prevent pulling or fraying.
What to avoid:
- Do not wet clean unless you are absolutely certain the fabric can tolerate it. Older textiles often have unstable dyes that will bleed or fade when dampened. Some natural fibers can shrink or distort.
- Avoid folding textiles for long-term storage. Roll them around acid-free tubes.
Reupholstery considerations:
If reupholstery becomes necessary, keep and label the original fabric, even if it is beyond repair. Future owners may use it to match patterns or confirm authenticity .
When to call a professional: Torn or weakened historic fabrics, deep-set staining, complex cleaning, and all reupholstery work .
Part 4: Museum-Inspired Advanced Restoration Techniques
Professional conservators use sophisticated technologies to restore relics without causing damage. While most home restorers will not have access to these tools, understanding them illuminates the complexity of proper conservation.
The “Rehydration” Technique for Organic Materials
At the Inner Mongolia Museum, conservator Shi Liqin faced a thousand-year-old embroidered leather bag from the Liao Dynasty (916–1125). The bag was composed of leather, textiles, and bronze—three materials with vastly different “temperaments” and moisture tolerances.
The solution was a bespoke “rehydration” regimen. By gradually adjusting temperature and humidity in a controlled environment, the leather fibers slowly “awakened” from their dehydrated state. The bronze buckle could then be safely removed without forcing or damaging the surrounding materials .
Takeaway for home restorers: Never force separation of stuck components. If a metal fitting is fused to wood or leather through corrosion or age, consult a professional rather than prying or cutting.
Low-Pressure Vacuum Cleaning
For fragile surfaces that cannot tolerate even gentle brushing, conservators use low-pressure vacuum cleaners that apply localized negative pressure to targeted areas. This removes surface dust and pollutants without physical contact .
Takeaway for home restorers: For extremely fragile relics (flaking paint, powdery corrosion, crumbling textiles), do not attempt to clean them yourself. Even a soft brush can cause irreversible damage.
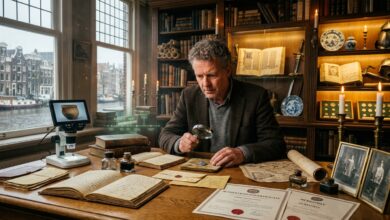
Analytical Technologies for Diagnosis
Museum conservators do not guess. They diagnose using:
Takeaway for home restorers: Before attempting any restoration, try to identify what you have. Look for maker’s marks, hallmarks, or labels. Use Google Lens as an affordable way to identify unknown pieces. Understanding the materials is the first step to preserving them .
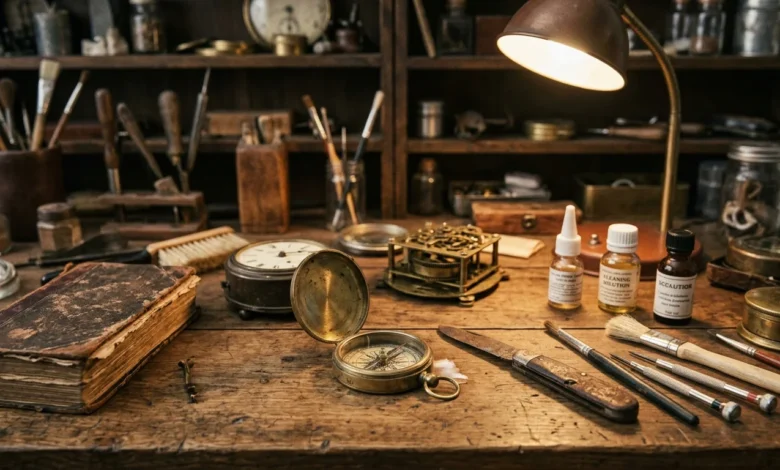
Microscopic Cleaning for Precision Work
For the Tang Dynasty gilded silver saddle ornament at the Inner Mongolia Museum, conservator Ji Yuanyuan faced extensive hard surface deposits on an extremely thin relic. Using surgical scalpels, bamboo splinters, and cotton swabs, the team spent nearly two months cleaning the saddle with surgeon-like precision .
Takeaway for home restorers: For detailed cleaning of intricate relics (carved wood, embossed metal, detailed ceramics), use precision tools. Cotton swabs, wooden toothpicks (blunted), and soft artist’s brushes are your friends. Work slowly. Rushing causes mistakes.
Part 5: Common Mistakes That Destroy Vintage Relic Value
Based on expert interviews and decades of collective experience, here are the most frequent—and costly—errors home restorers make.
Mistake 1: Sanding
“Never, ever sand your antiques,” warns Matthew Crawford, co-founder of London-based furniture restorers After Noah. Sanding removes not just the finish but the original wood. Crisp edges and fine details disappear. Once original patina is gone, it is gone forever .
Mistake 2: Painting Over Quality Wood
Painting over original wood finishes or veneers is one of the quickest ways to devalue a piece. “Anything that takes away original features or patina such as painting over quality wood… can devalue a piece” .
Mistake 3: Replacing Original Hardware with Modern Copies
Those shiny new handles from the hardware store may look “better,” but they announce to collectors that the piece has been altered. Original handles, even if tarnished or worn, are part of the object’s history. If a replacement is absolutely necessary, keep the original hardware stored with the piece .
Mistake 4: Using Harsh Chemical Strippers
Chemical strippers can melt away old glues, damage wood fibers, and leave residues that interfere with future conservation. They are rarely necessary and almost never appropriate for valuable antiques.
Mistake 5: Falling for Viral “Quick Fixes”
Social media makes restoration look wonderfully quick and easy. What you do not see are the irreversible mistakes. “Miracle” home remedies like lemon juice or vinegar can leave stains, warping, or corrosion .
Mistake 6: Over-Polishing Silver
Each time you polish silver, you remove a microscopic layer of metal. Over decades, this can wear down hallmarks, soften engravings, and thin the piece. Polish sparingly, and only when necessary.
Part 6: The Green Future of Relic Restoration
The field of conservation is evolving toward sustainability. The European Commission’s GREENART project (GREen ENdeavor in Art ResToration) is developing new solutions based on green and sustainable materials and methods to preserve cultural heritage .
These include:
- Protective coatings made from waste and plant proteins, with self-healing and reversible properties
- Biodegradable foams and packaging from renewable sources
- Consolidants based on natural polymers to mechanically strengthen weak artifacts
- Gels and cleaning fluids inspired by advanced systems, improved according to green and circular economy principles
For home restorers, this trend reinforces existing best practices: use the mildest cleaning agents possible, prefer natural materials over synthetic, and always prioritize reversibility.
Part 7: Documentation – The Forgotten Step
Before you touch your vintage relic, document everything.
Step-by-step documentation:
- Photograph the piece from every angle before beginning any work .
- If you make changes, document them. Keep receipts, write a short account of what was done and why.
- If a part must be replaced, keep the original. Wrap it, label it, and store it safely .
This simple archive serves multiple purposes:
- It provides a record for future owners and valuers
- It helps professionals understand the piece’s journey
- It can protect value by proving that changes were thoughtful and minimally invasive
As one expert notes, “This simple archive can help future owners and valuers understand its journey” .
Part 8: When to Call a Professional
Knowing your limits is a sign of wisdom, not weakness. Call a professional conservator when:
How to find a qualified professional:
- Look for conservators accredited by professional organizations
- Ask about their training and experience with your specific type of relic
- Request references or examples of previous work
- Avoid anyone who promises quick fixes or uses terminology like “up-cycling” for antiques (as one expert notes, “when I see the term ‘up-cycling’, it sends shivers down my spine”)
Frequently Asked Questions (FAQ)
Q1: Can I clean an old wooden table with vinegar and water?
A: No. Vinegar is acidic and can damage old finishes, leaving stains or causing warping. Use distilled water with a drop of pH-neutral soap on a nearly dry cloth. Avoid all “miracle” home remedies .
Q2: How do I remove white water rings from antique wood?
A: This is tricky. Minor rings may respond to gentle buffing with a soft cloth. For deeper marks, consult a professional. Do not use abrasive polishes or attempt to sand the ring out—you will remove the surrounding finish and create a larger problem.
Q3: Is it safe to use superglue to fix a broken ceramic vase?
A: No. Superglue (cyanoacrylate) yellows over time, leaves visible repair lines, and is irreversible. Professional conservators use specialized adhesives that can be reversed and color-matched fills that blend invisibly .
Q4: How can I tell if corrosion on a bronze relic is harmful?
A: Stable patina is typically brown, green, or black and feels solid to the touch. Harmful rust (bronze disease) appears as light green powder that flakes off. If you see powdery green corrosion, consult a professional immediately .
Q5: Should I remove the old finish from my antique chair before refinishing?
A: No. Refinishing (removing the original finish) destroys the patina that collectors value. It can reduce the piece’s value by 50% or more. Consider conservation (light cleaning and waxing) instead of restoration .
Q6: Can I put antique silver in the dishwasher?
A: Never. Dishwasher detergents are too harsh, high temperatures can damage the metal, and contact with other metals can cause galvanic corrosion. Hand wash gently or simply dust with a soft cloth .
Q7: What is hide glue and why should I use it?
A: Hide glue is a traditional adhesive made from animal collagen. It is reversible—future conservators can soften it with heat and moisture to disassemble joints without damaging the wood. Modern PVA glues create permanent, rigid bonds that cannot be reversed .
Q8: How do I clean an old quilt without damaging it?
A: Vacuum with low suction and a soft brush attachment covered with muslin cloth. Do not wash or dry clean unless absolutely certain the fabrics and dyes are stable. Consult a textile conservator for valuable quilts .
Q9: The original finish on my vintage furniture is flaking. What should I do?
A: Do not attempt to remove the flakes. This is a job for a professional conservator who can stabilize the existing finish without stripping it. In the meantime, avoid dusting or touching the flaking areas.
Q10: How much does professional antique restoration cost?
A: Costs vary widely based on the piece, the damage, and the conservator’s rates. Simple cleaning and waxing of a small table might cost 100–300. Complex structural repairs, French polishing, or textile conservation can run into the thousands. Always get a written estimate before proceeding.